
How to Set Up a Google Analytics 4 Property: Easy to Follow Guide
Are you still using Universal Analytics (UA) for your website? Well, it’s time to face the inevitable. Google is retiring Universal Analytics on July 1, 2023.
Change can be intimidating, and you might feel overwhelmed by learning a new analytics platform. That’s where I can help.
There are many guides out there showing you how to set up Google Analytics 4 (GA4). I will do my best to consolidate all the most important information here.
This guide covers three possible scenarios you may encounter when upgrading to a GA4 property.
Use this table of contents to jump to a scenario that’s relevant to you:
Why should you create a GA4 property now?
As mentioned above, Universal Analytics will stop collecting data on July 1, 2023. That’s why you must switch to Google Analytics 4 immediately.
Universal Analytics and Google Analytics 4 are very different, so different that there’s no way for you to transfer your UA traffic data to a GA4 property.
If you do not switch before the deadline, you’ll have a period when no website traffic data is being tracked.
There’s a good chance your current situation aligns with one of the scenarios below. Follow the steps for the one that’s most relevant to you.
Scenario 1: You have Universal Analytics but have not created your GA4 property yet
If you’re in this situation, you must upgrade to Google Analytics 4.
The steps below will walk you through the general process for switching to GA4.
1. Review and record everything you’re tracking in your current Universal Analytics configuration
GA4 does have an easy setup assistant to follow, but you’ll want to do your due diligence in creating a list of everything you track. Focus on what’s essential to your business or the metrics you regularly view.
Do not overlook this step because the GA4 setup assistant isn’t perfect. This step will help reassure you that you haven’t missed any important UA events when setting up your GA4 property.
2. Setting up a GA4 property using the Setup Assistant
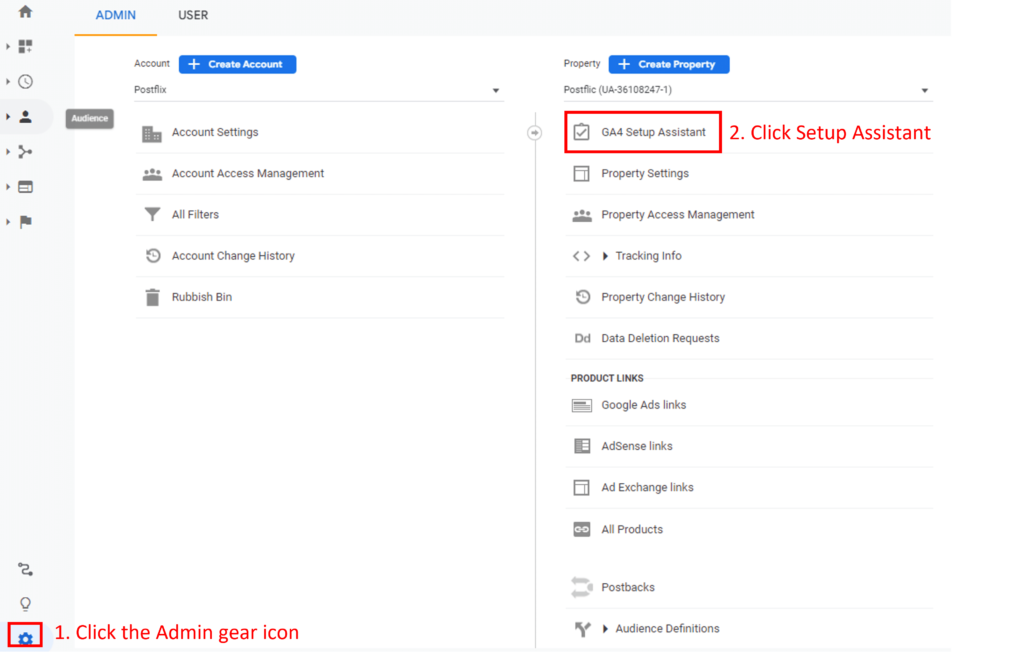
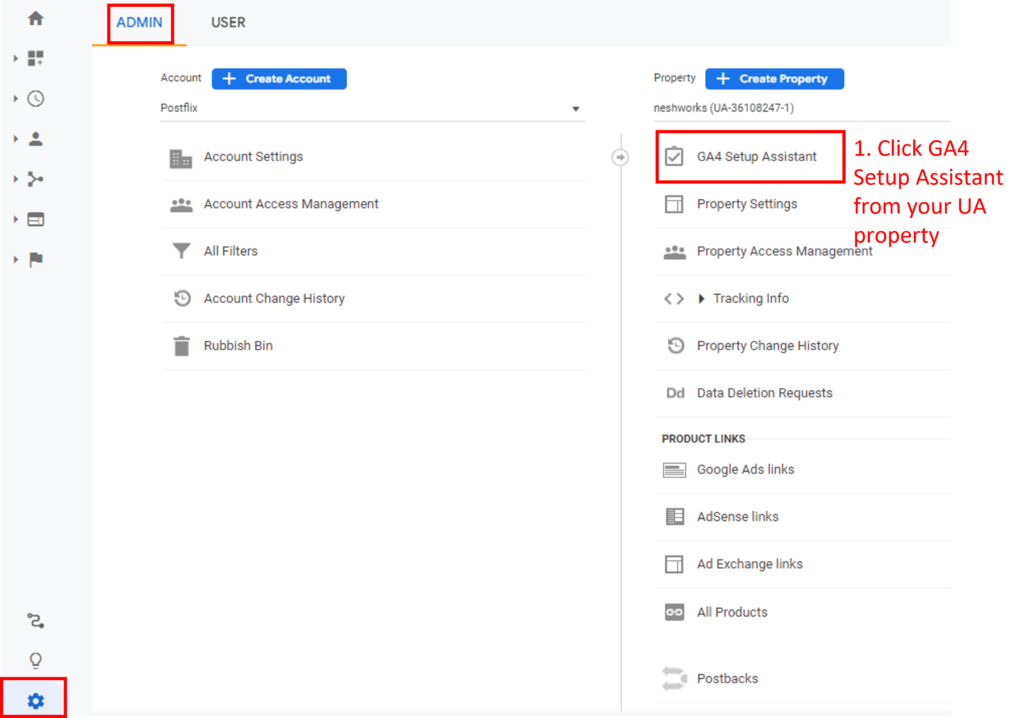
Step 1: Click the gear icon in the bottom left to open the Admin console.
Step 2: Under the property column, click the first option GA4 Setup Assistant.
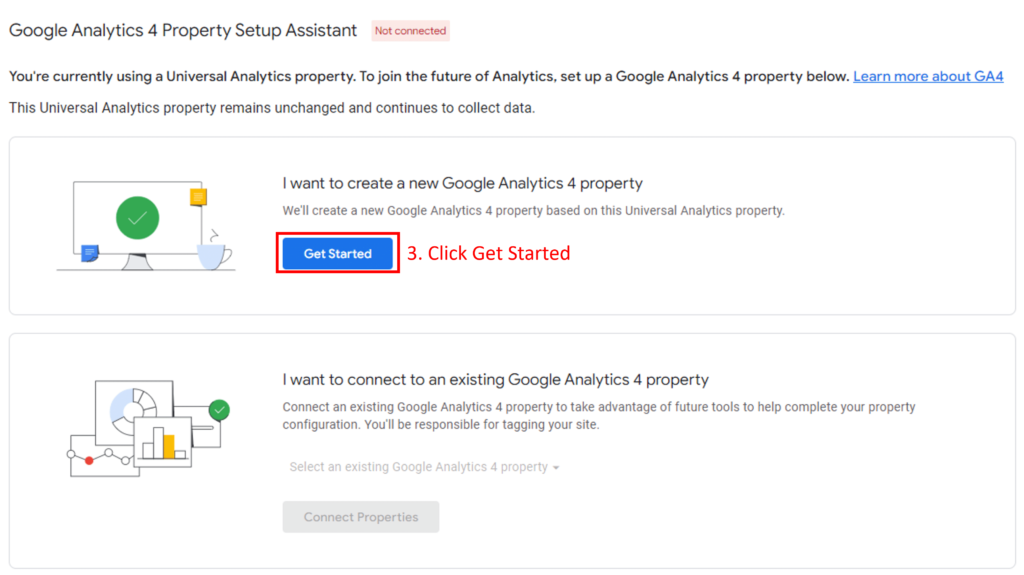
Step 3: Click ‘Get Started’ to create a new Google Analytics 4 property.
Step 4: Click ‘Create and Continue‘
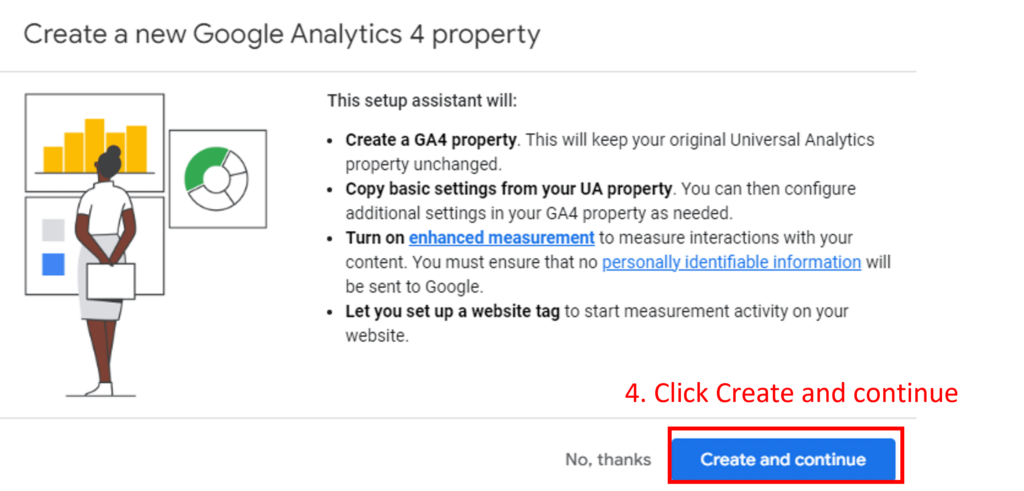
Your GA4 property is now created and has copied the basic settings from your Universal Analytics property.
When you go to your UA property and click GA4 Setup Assistant, you’ll see the green Connected icon.
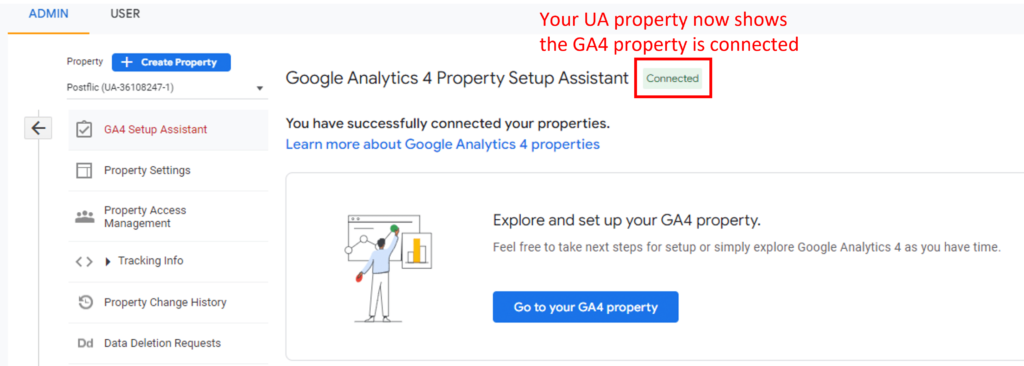
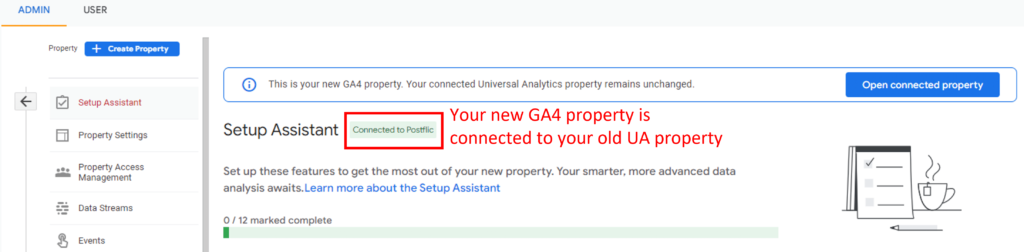
And when you go to your new GA4 property and click Setup Assistant, you’ll see the green Connected icon indicating you’re connected to your old UA property.
Success! You now have at least two GA properties; your old UA property and your new GA4 property.
Not so fast. You’re not done setting up Google Analytics 4.
You now need to ensure your new GA4 property is collecting data. To do that, ensure your website is tagged with Google’s tag.
You have a few options for installing the Google tag:
- Google Tag Manager (I’ll take you through this method. It’s the most common implementation.)
- CMS Plugins (i.e. Google Site Kit for WordPress)
- Manually installing the code (we won’t go into this method as most web admins will be using a tag manager)
Let’s start with Google Tag Manager.
3. Install your new GA4 tag with Google Tag Manager
Note: Once your GA4 property is created, you’ll be prompted to choose how to set up a Google tag. Because you’re going to implement the tag in Google Tag Manager, you can close this window.
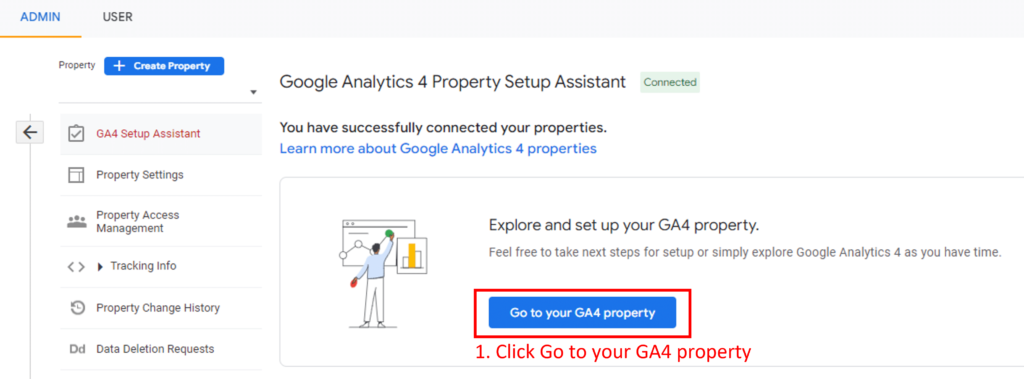
Step 1: From your Universal Analytics property, click ‘Go to your GA4 property’ in the GA4 Setup Assistant.
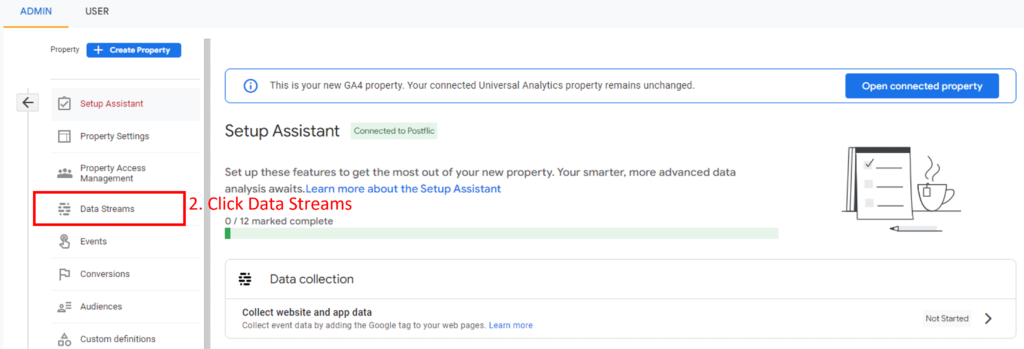
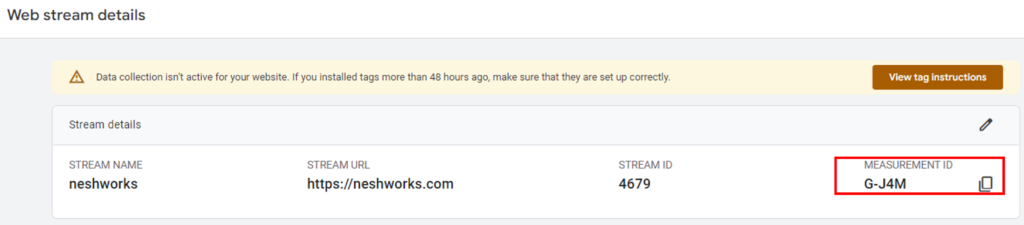
Step 2: Click Data Streams under the Property settings
Step 3: Click on your website under Data Streams. You should only see one data stream because this is your first time setting up a GA4 property.

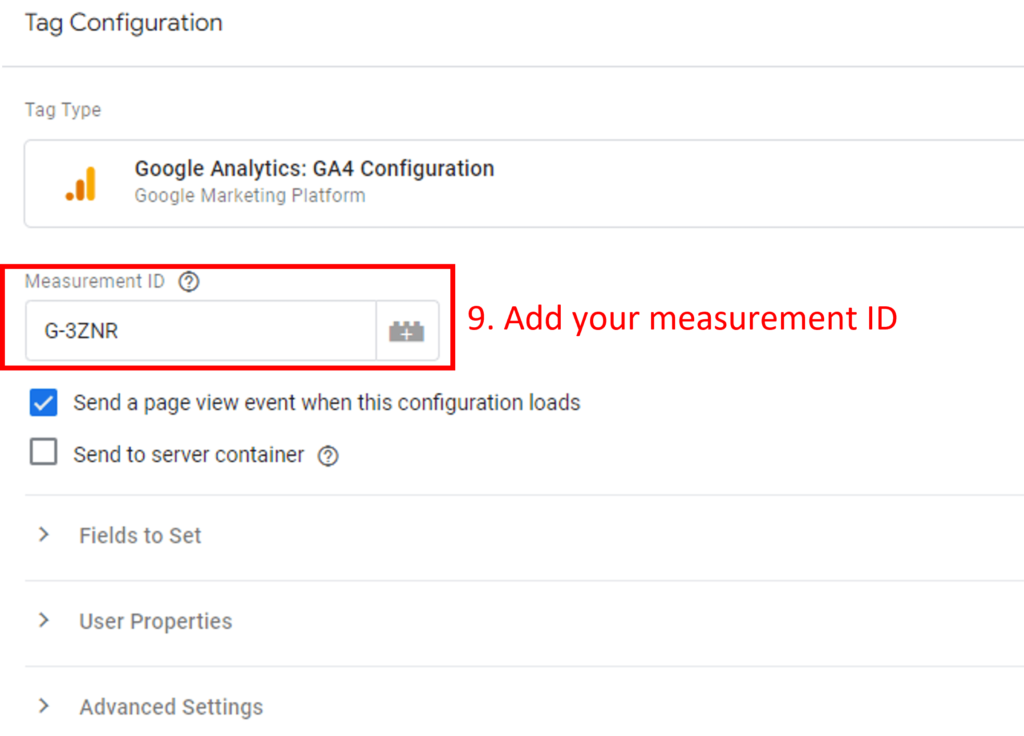
Step 4: Click on the copy icon next to your measurement ID. Ignore the brown ‘View tag instructions’ button.
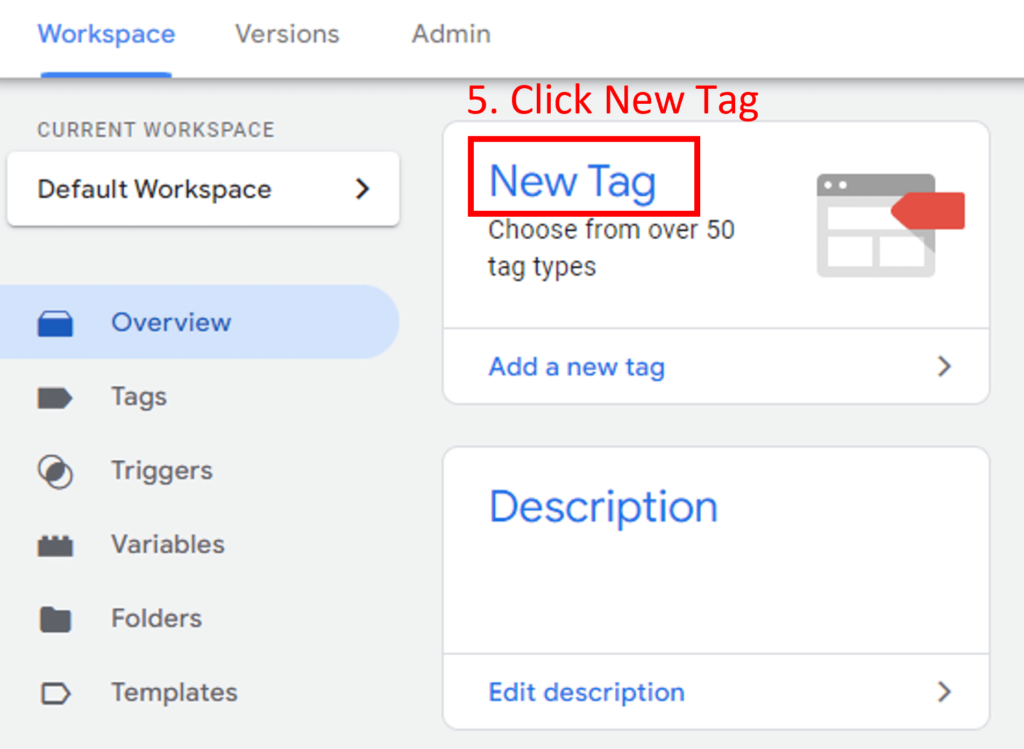
Step 5: Open a new tab in your browser and go to your Google Tag Manager account. Click New Tag.
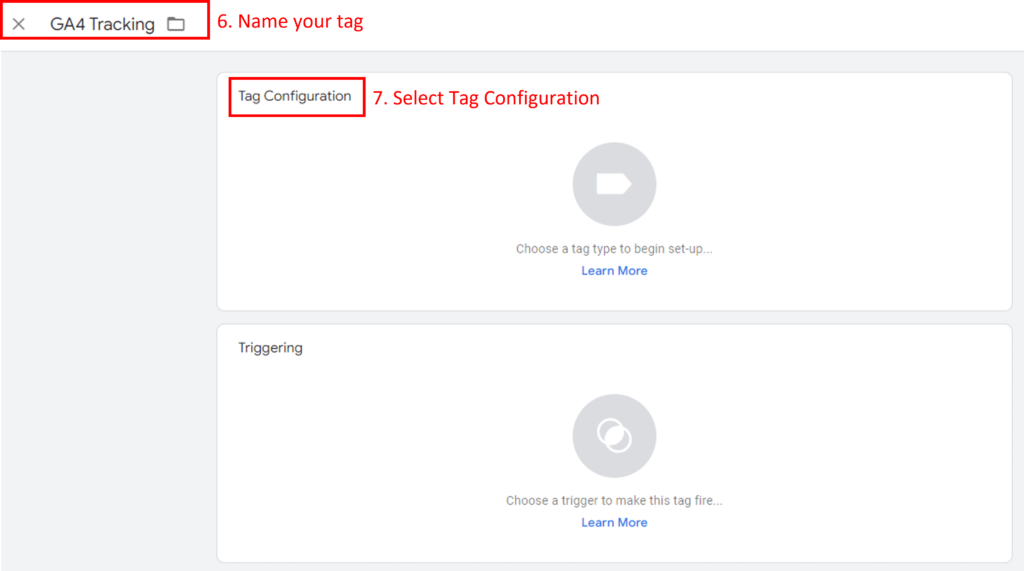
Step 6: Name your tag. Call it anything, but make sure to include GA4 or Google Analytics 4 in the name.
Step 7: Click on Tag Configuration.
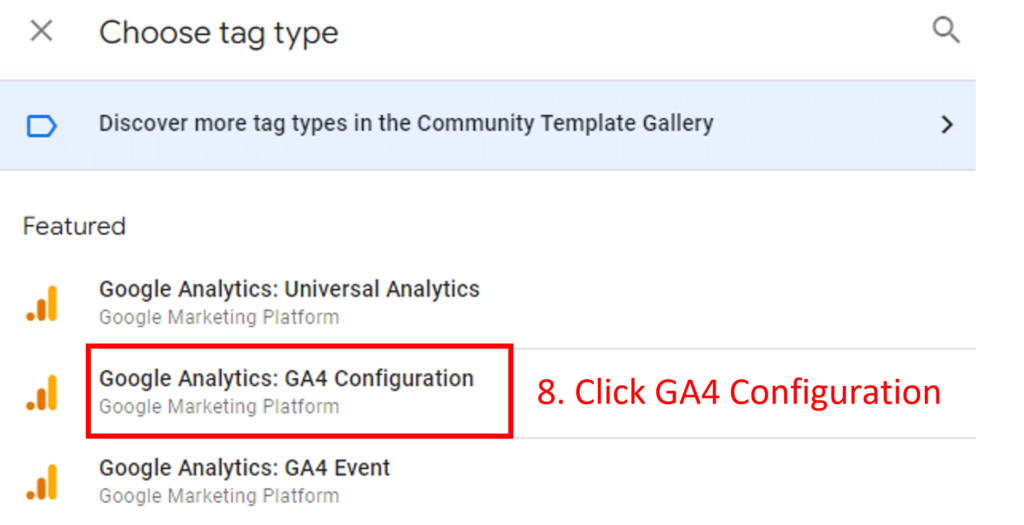
Step 8: A menu pop-up will appear on the right of your screen. Click Google Analytics: GA4 Configuration.
Step 9: Paste the measurement ID you copied in Step 4.
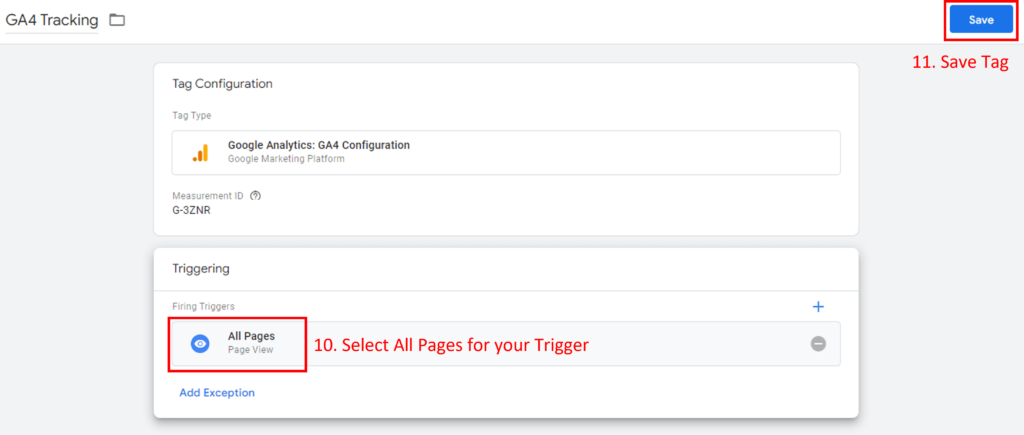
Step 10: Click Trigger below the Tag Configuration box. Select All Pages. This means your GA4 tag will fire when someone visits any page on your website.
Step 11: Click the Save button to save your tag.
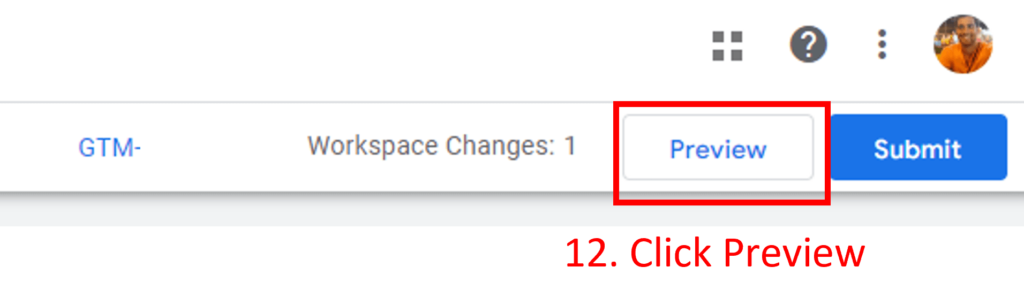
Step 12: You’ll be taken to the main GTM dashboard once you save your tag. Click the Preview button in the top right to test if your tag is firing on all website pages.
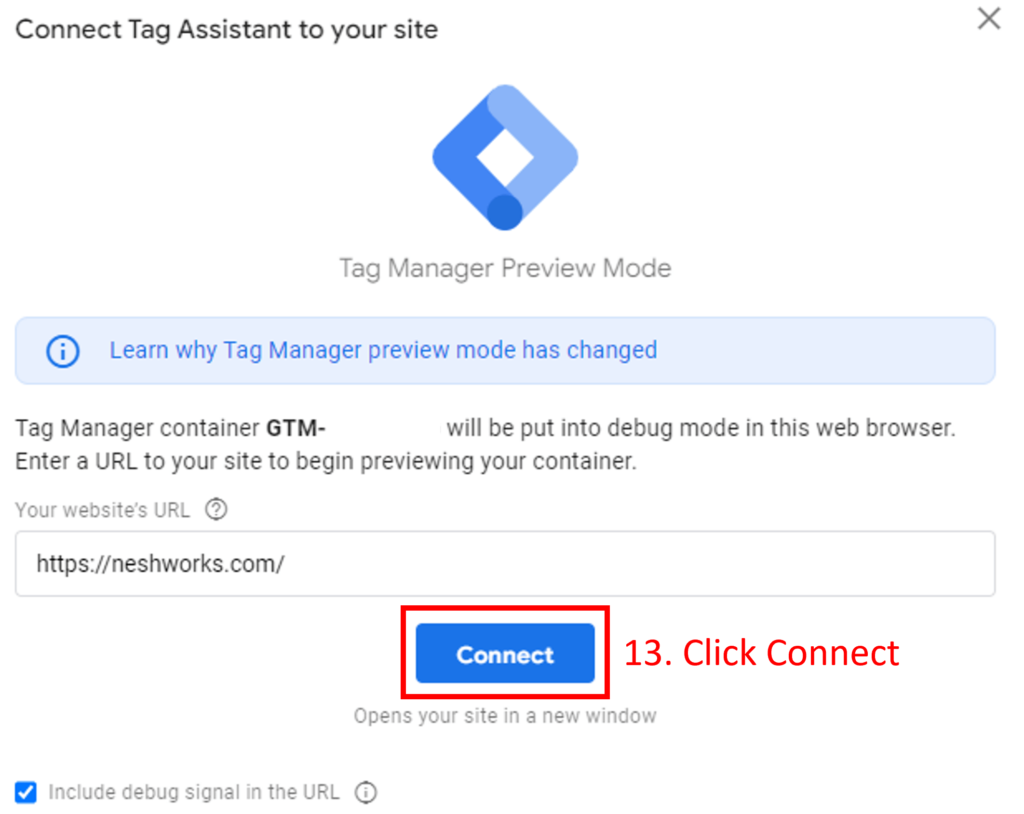
Step 13: The Tag Assistant window will open. Input your website’s URL and click Connect.
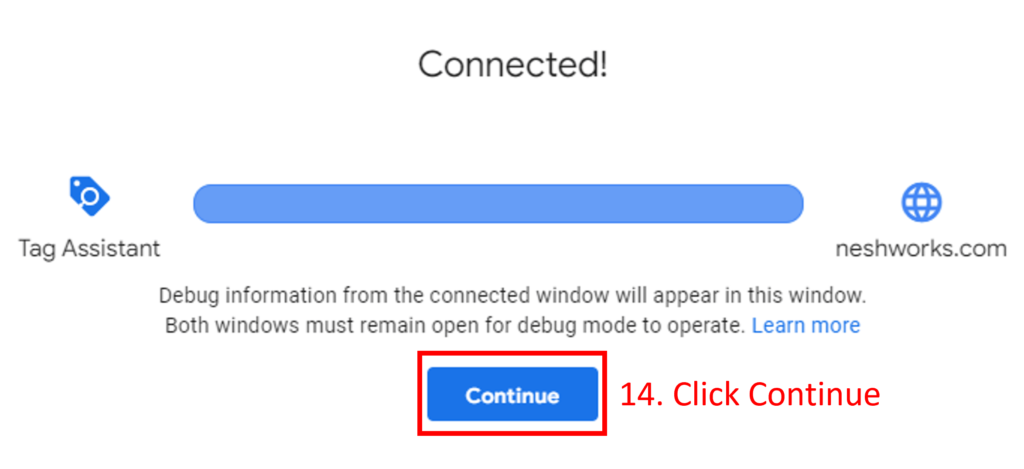
Step 14: Google’s Tag Assistant will open your website in another window. The connection box appears, indicating a successful link between your site and Tag Assistant.
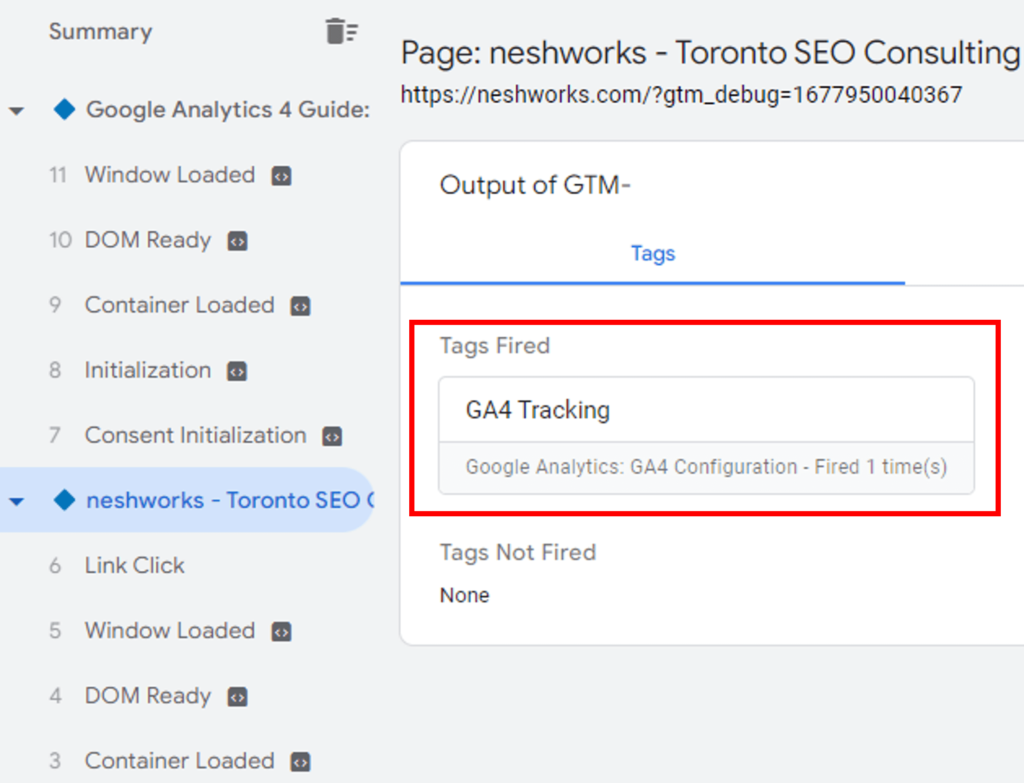
Step 15: Visit a few pages on your site to see the pages firing your GA4 tag. Because you set up the GA4 tag to fire on all pages, you should see it appear under ‘Tags Fired’ for every page. In the screenshot, you can see my GA4 tag firing on my home page and blog page.
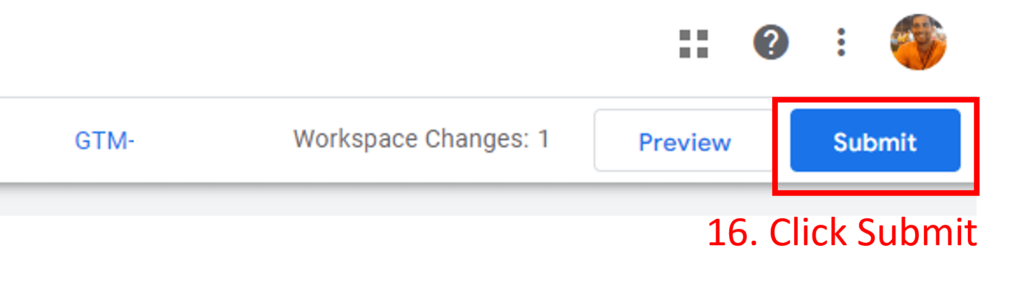
Step 16: Time to push your new GA4 tag live. On the GTM home dashboard, click the Submit button in the top right.
Step 17: Organize your GTM account by naming a new version whenever you publish changes. Since we’re adding a GA4 tag, you can call this version “Add GA4 tag to website” or follow your naming conventions.
Step 18: Click the Publish button to push your GA4 tag live.

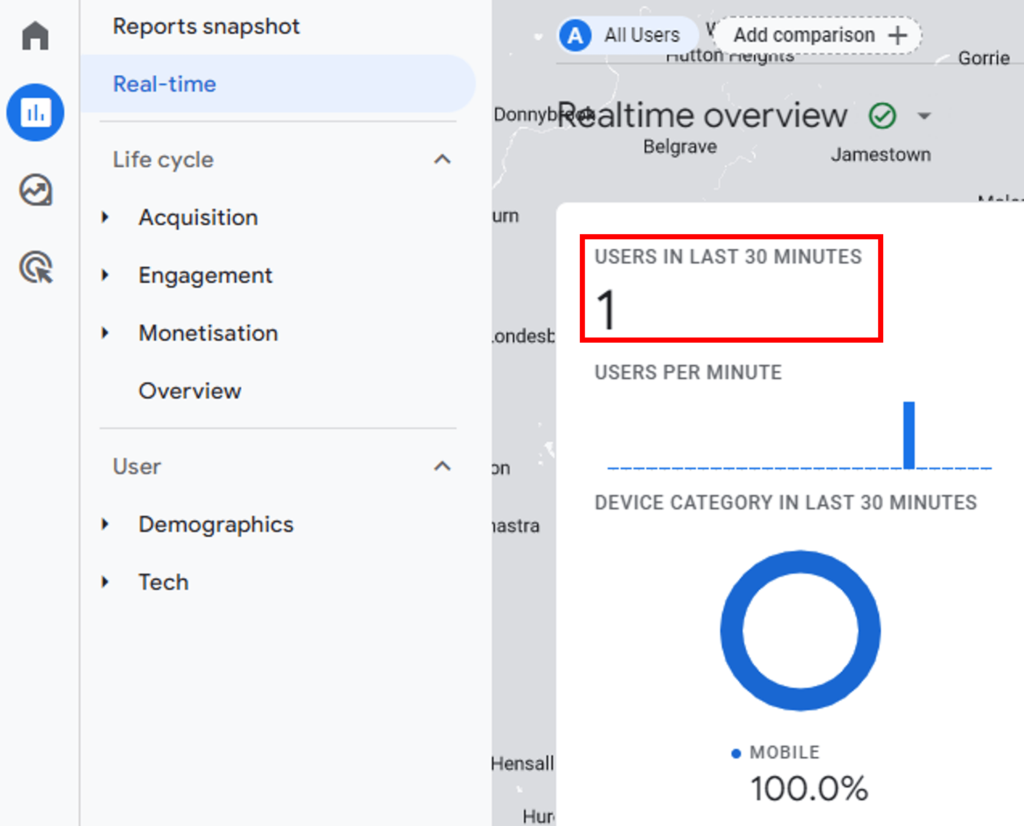
You can double-check that you’re GA4 tag is working by viewing the Real-Time report in Google Analytics 4. Make sure you’re on your site, and you should see the traffic coming in.
Scenario 2: You have just launched your website and need to install Google Analytics for the first time
Follow these simple steps to install Google Analytics for the first time on your website—no point in installing Universal Analytics for a new website.
1. Create a Google Analytics 4 account
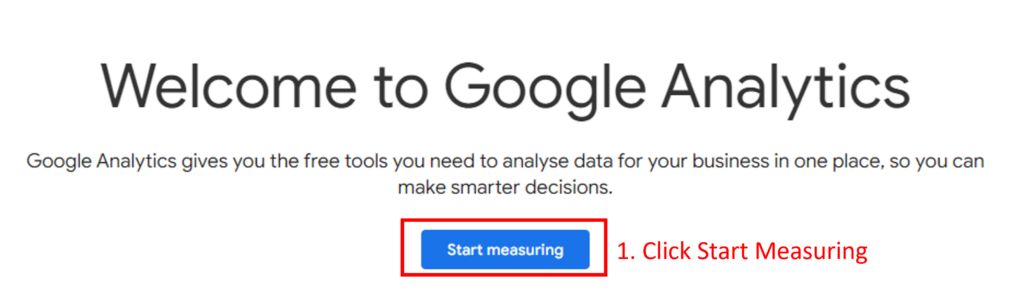
Step 1: Login into analytics.google.com with your Google username and password. You’ll see the Welcome to Google Analytics homepage. Click Start Measuring.
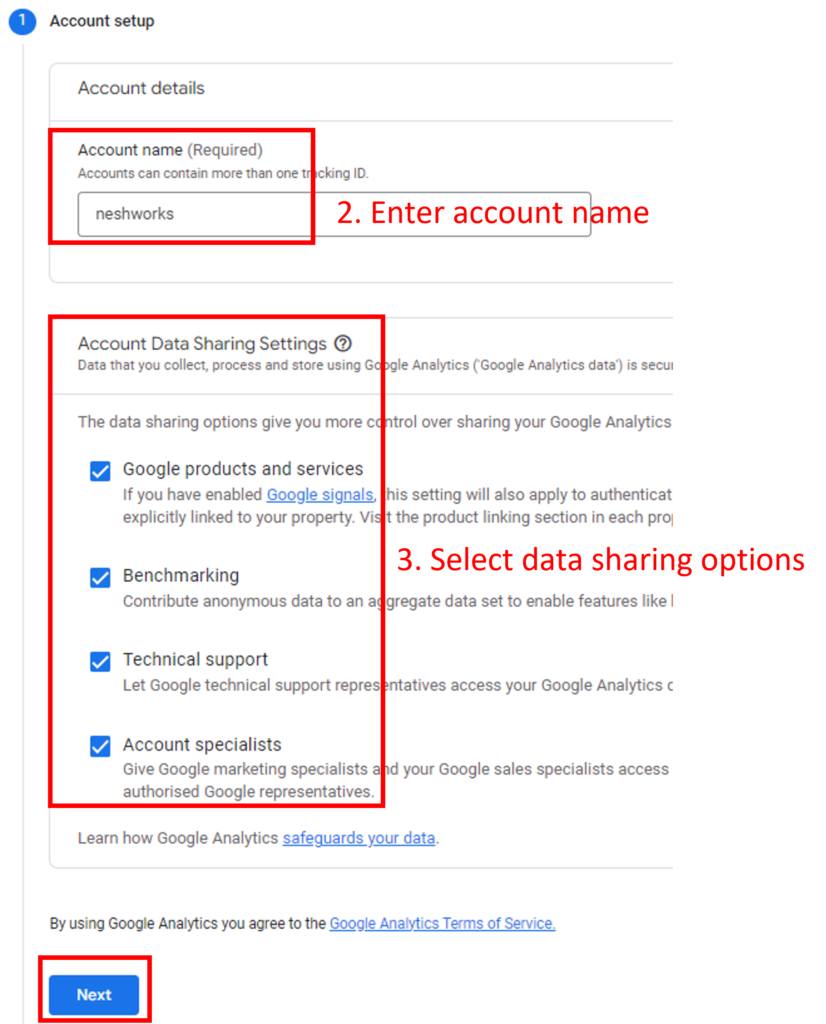
Step 2: Enter an account name (name of your company, brand)
Step 3: Select the data-sharing options you want to share with Google. Click Next.
- Google products & services – When you turn this setting ON, Google can use the data to understand online behaviour and trends, which helps improve Google overall.
- Keep this setting OFF if you’re only using Google Analytics and not actively using other products like Google Ads, Optimize, Data Studio, etc.
- Keep this setting OFF if you’re only using Google Analytics and not actively using other products like Google Ads, Optimize, Data Studio, etc.
- Benchmarking – When you turn this setting ON, Analytics data can help build better tools and provide guidance to help your marketing and analysis efforts.
- Keep this setting OFF if you prefer not to share your data with 3rd party platforms.
- Keep this setting OFF if you prefer not to share your data with 3rd party platforms.
- Technical support – When you turn this setting ON, it allows Google support to access your account to troubleshoot if you report an issue in your account.
- Keep this setting OFF if you’re not using Google Analytics 360.
- Keep this setting OFF if you’re not using Google Analytics 360.
- Account specialists – When you turn this setting ON, the Google Analytics sales team could help you find ways to improve your advertising spend if you’re running ads.
- Keep this setting OFF if you’re not using Google Analytics 360.
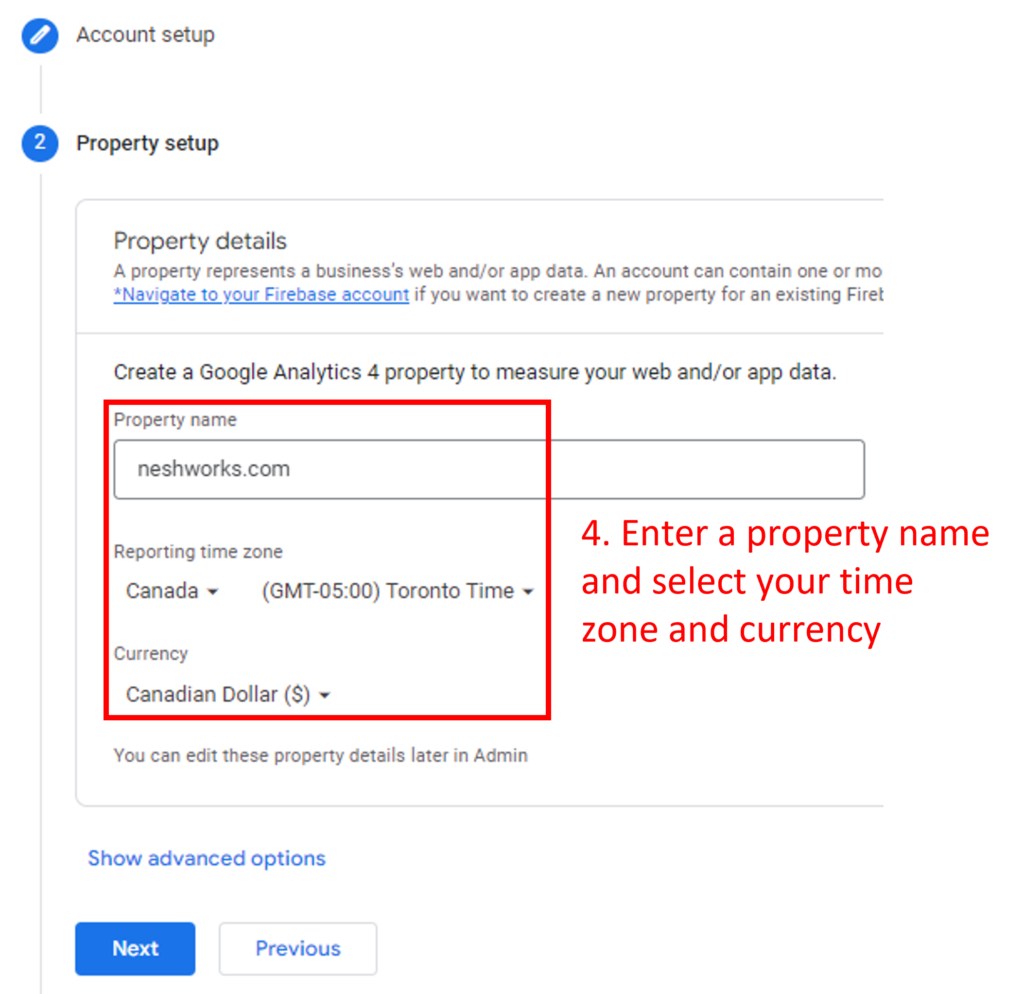
Step 4: Enter a property name (best to use your domain – neshworks.com). Click Next.
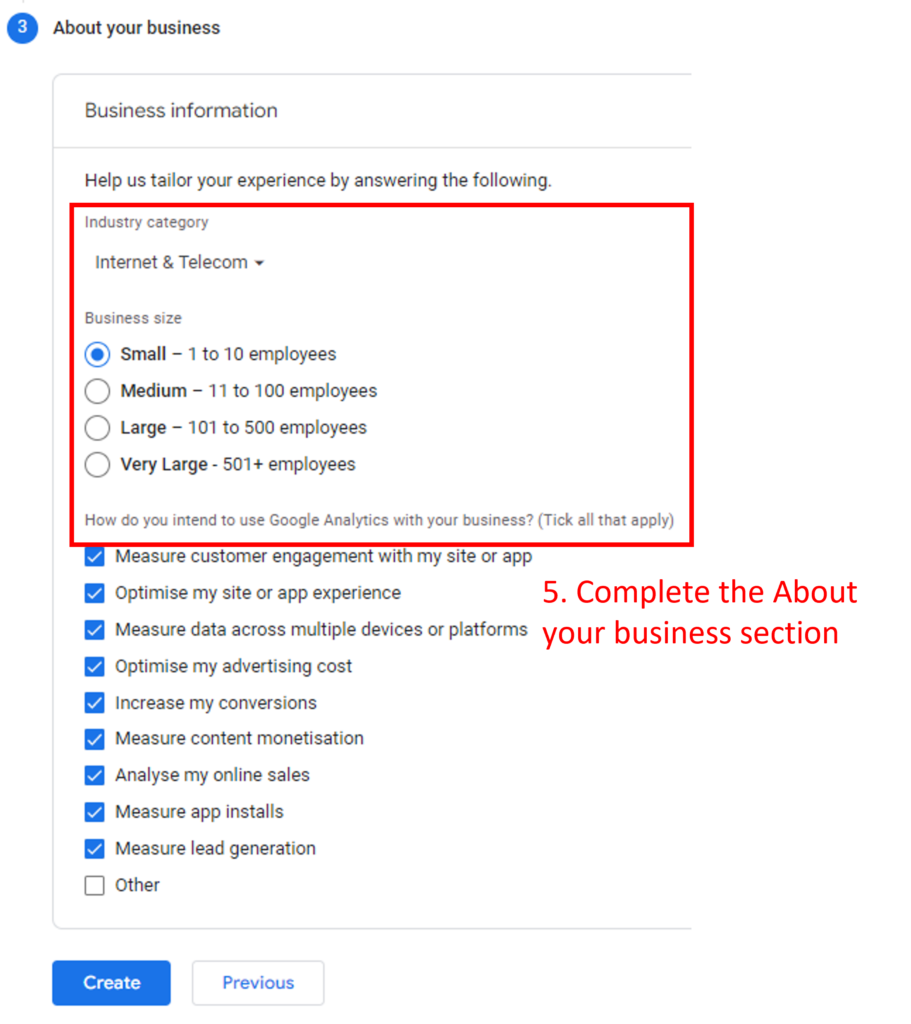
Step 5: Select the most relevant industry category for your business. If nothing fits, then use ‘Other.’ Choose your business size based on the number of employees. Let Google know how you intend to use GA4.
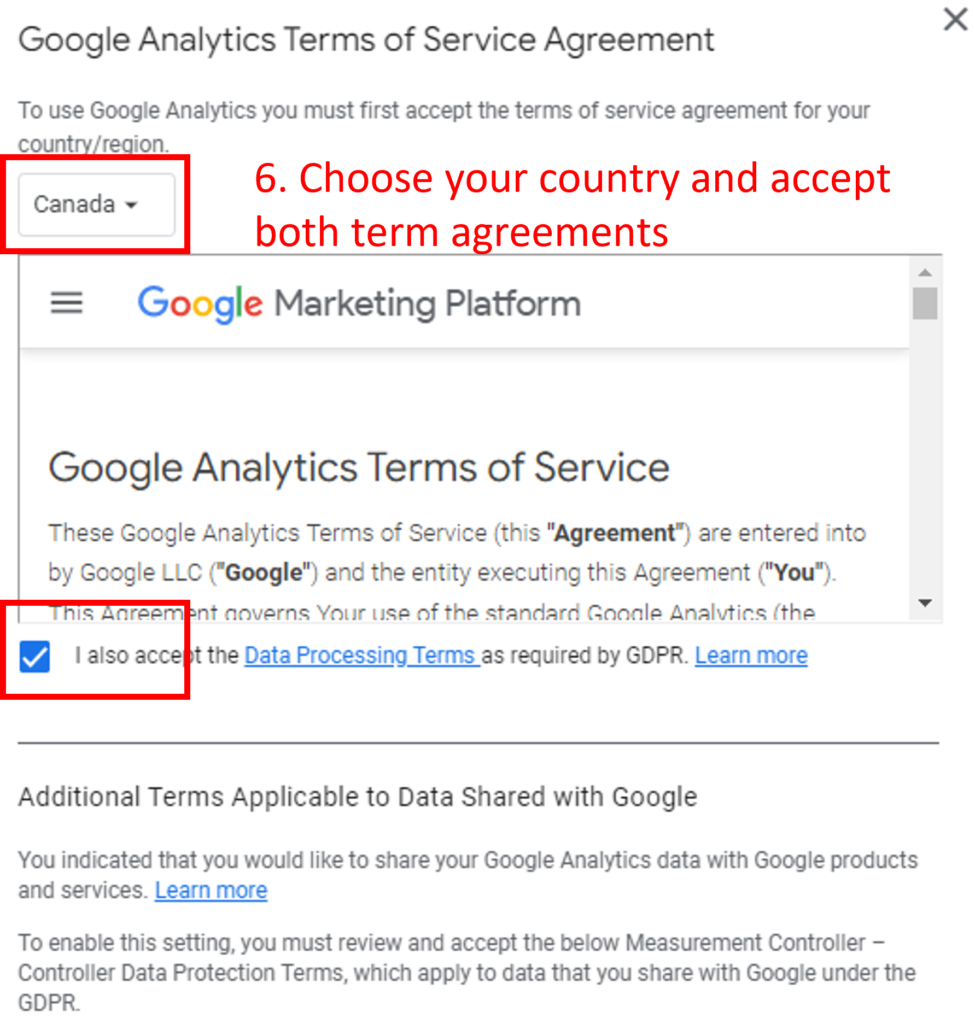
Step 6: Choose your country/region and accept the Data Processing Terms and Measurement Controller Terms (scroll down to see the second terms agreement).
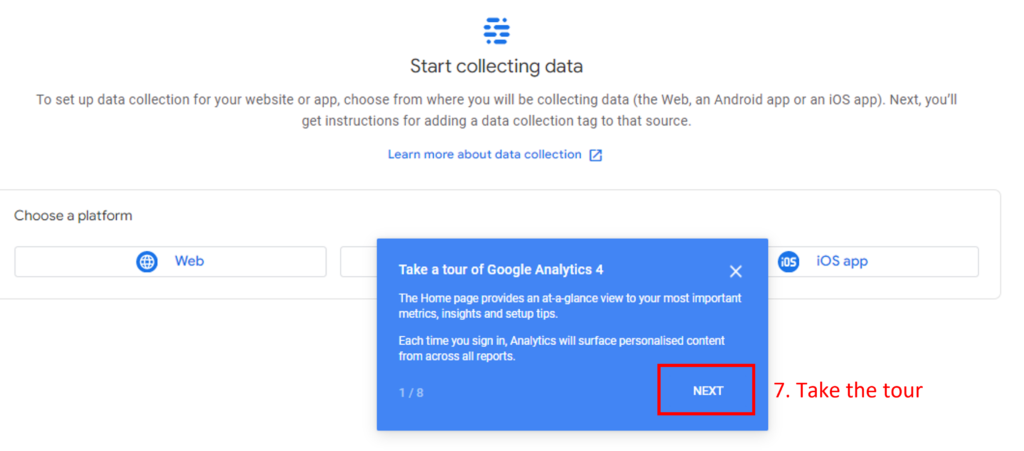
Step 7: Success – you now have a GA4 property!
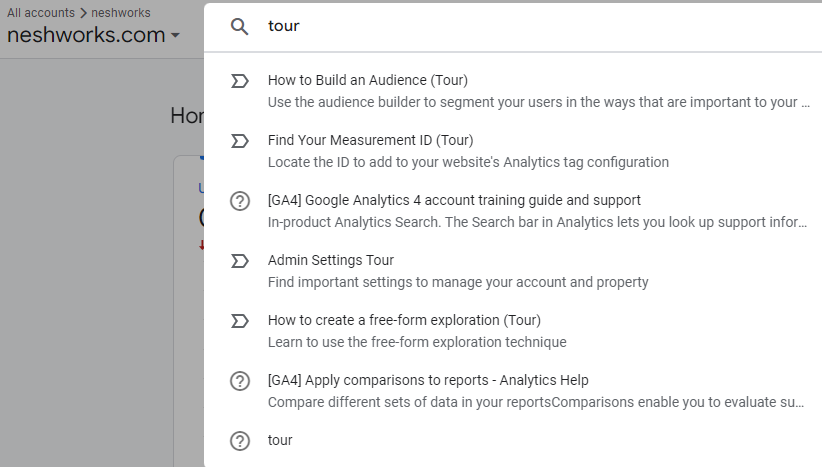
Take the tour to get familiar with the user interface. It only takes a few minutes and shows you where to find ‘Reports Snapshot,’ ‘Life Cycle Reports,’ ‘User Reports,’ ‘Explorations,’ ‘Advertising’ and ‘Admin’ settings.
If you choose to skip the tour, you can always search ‘tour’ in the top search bar to go through it later.
2. Setting up a Google Analytics 4 property
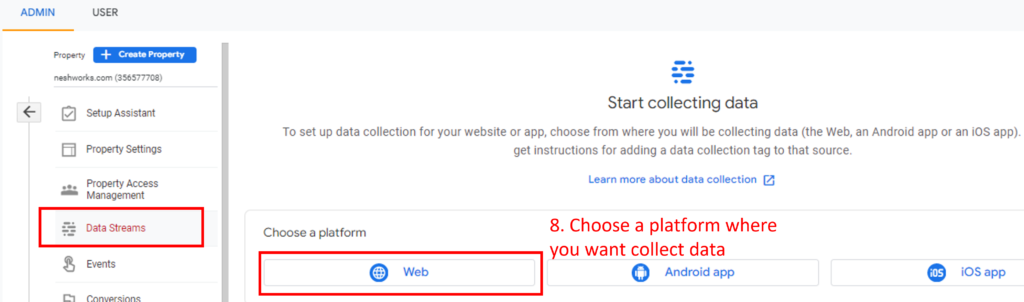
Step 8: Now, let’s start collecting some data! Choose a platform where you want to collect the data. For most of you, starting now, it will be ‘Web.’
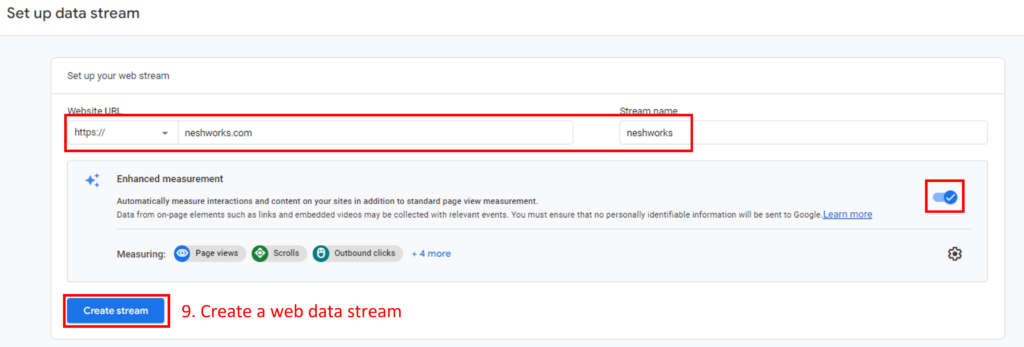
Step 9: Set up your first data stream. Enter your website URL and data stream name, and enable Enhanced Measurement. Click Create Stream.
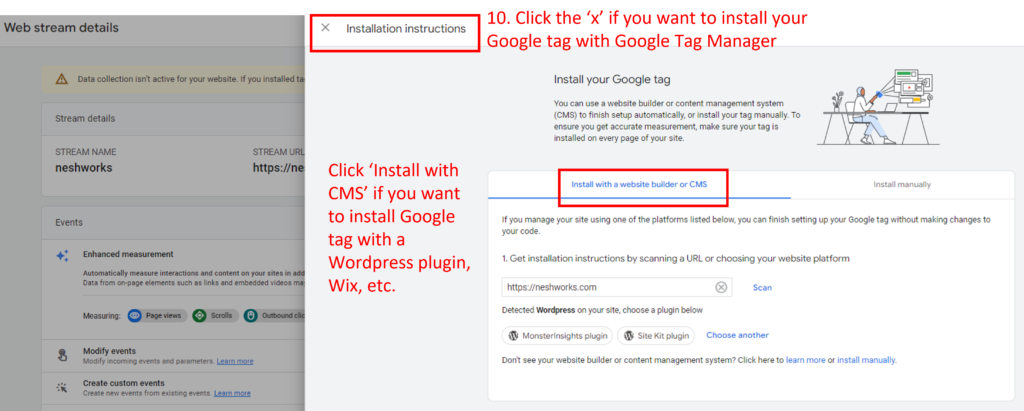
Step 10: An Installation Instructions page will appear. Click the ‘X’ to install your Google Tag with Google Tag Manager.
You also have the option to install the tag with a website builder or CMS plugin:
- WordPress (Site Kit plugin, MonsterInsights plugin)
- Drupal
- Wix
- Duda
- Squarespace
- One.com
- Typo3
Google has provided a step-by-step guide for each website builder and CMS plugin listed above.
Step 11: For the Google Tag Manager users, copy the measurement ID and follow steps 5 to 18 in the Scenario 1 section above.
Scenario 3: You have a GA4 property and still need to link it to Universal Analytics
This is for you, early adopters. Follow these steps if you set up a GA Apps + Web Property back in 2020 and still haven’t linked it to your Universal Analytics. GA4 property is the new name for GA Apps + Web Property.
Although, if you haven’t connected them yet, what have you been up to!?
1. Link your GA Apps + Web Property (GA4) to Universal Analytics
Step 1: Go to the Admin section in your Universal Analytics property and click on GA4 Setup Assistant.
Step 2: Go to the “I want to connect to an existing Google Analytics 4 property” box. Select an existing Google Analytics 4 property.
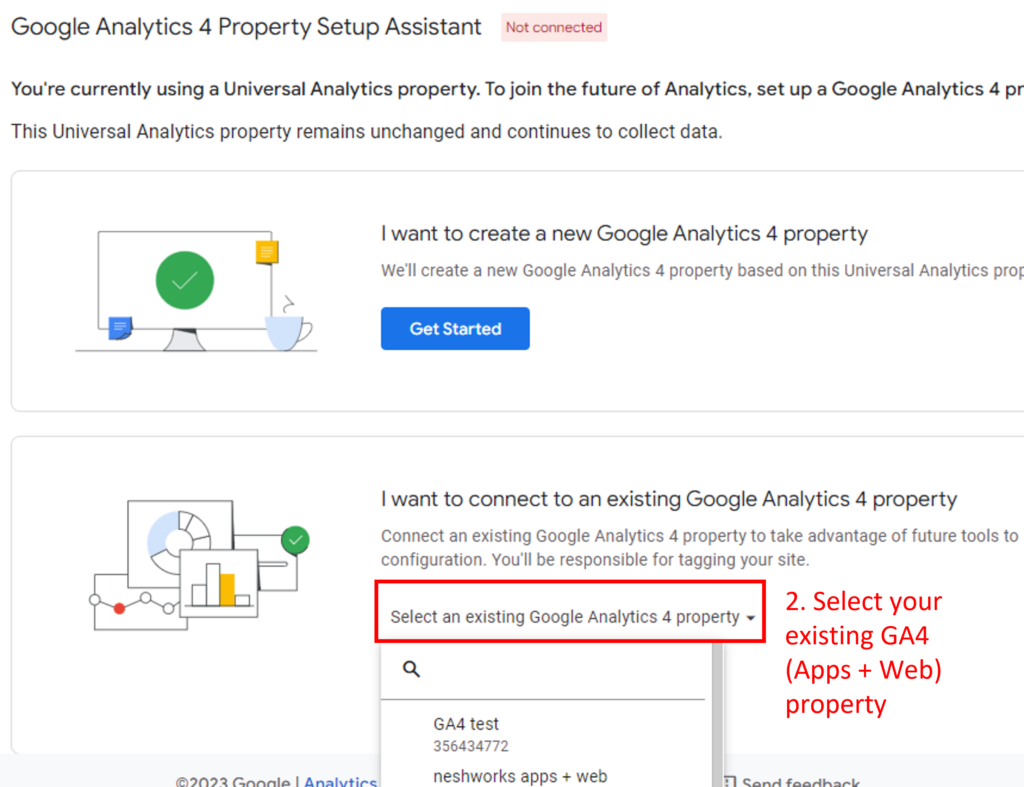
Step 3: Choose your existing GA4 property. Click Connect Properties.

Success! You should see the green connected icon next to the ‘Google Analytics 4 Property Setup Assistant’ headline.
Step 4: Click Go to Your GA4 Property.

Step 5: Confirm the GA4 Property also shows the green ‘Connected to …’ icon.

Opt-out of Google automatically setting up a GA4 property for you
Google has mentioned that if a new GA4 property is not made in early 2023, they will automatically create one based on your Universal Analytics settings. It will be a basic configuration.
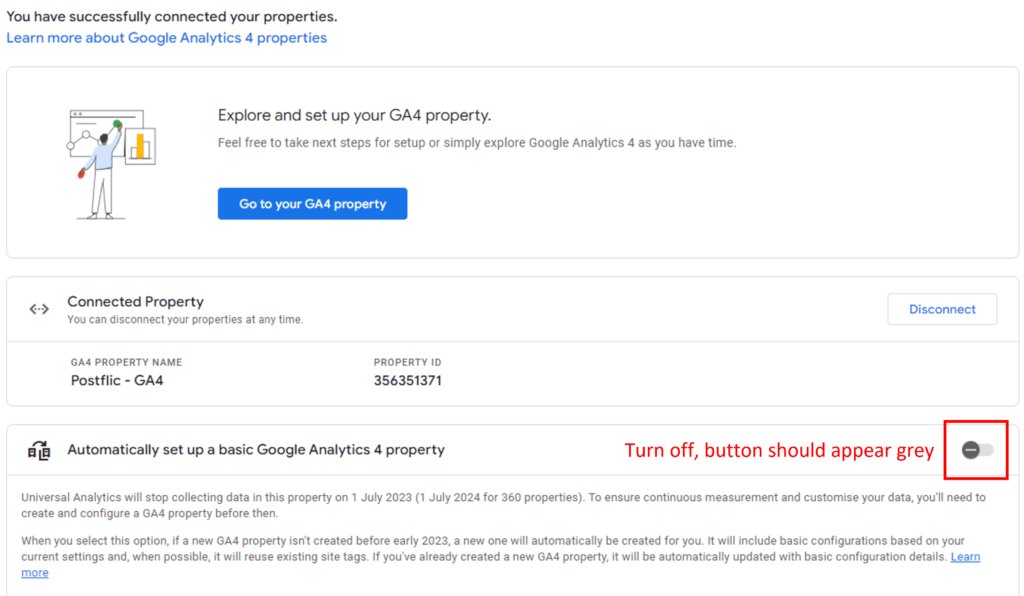
However, if you’ve created a GA4 property yourself and gone through the process of setting up new events and other advanced configurations, then you should turn this feature off.
You want to avoid risking Google automatically creating a new GA4 property and overwriting everything you’ve already configured.
Go to your Universal Analytics property and click GA4 Setup Assistant in the property column. At the bottom, you’ll see a section explaining the automatic creation of a basic GA4 property. Disable the blue button to turn off this feature.
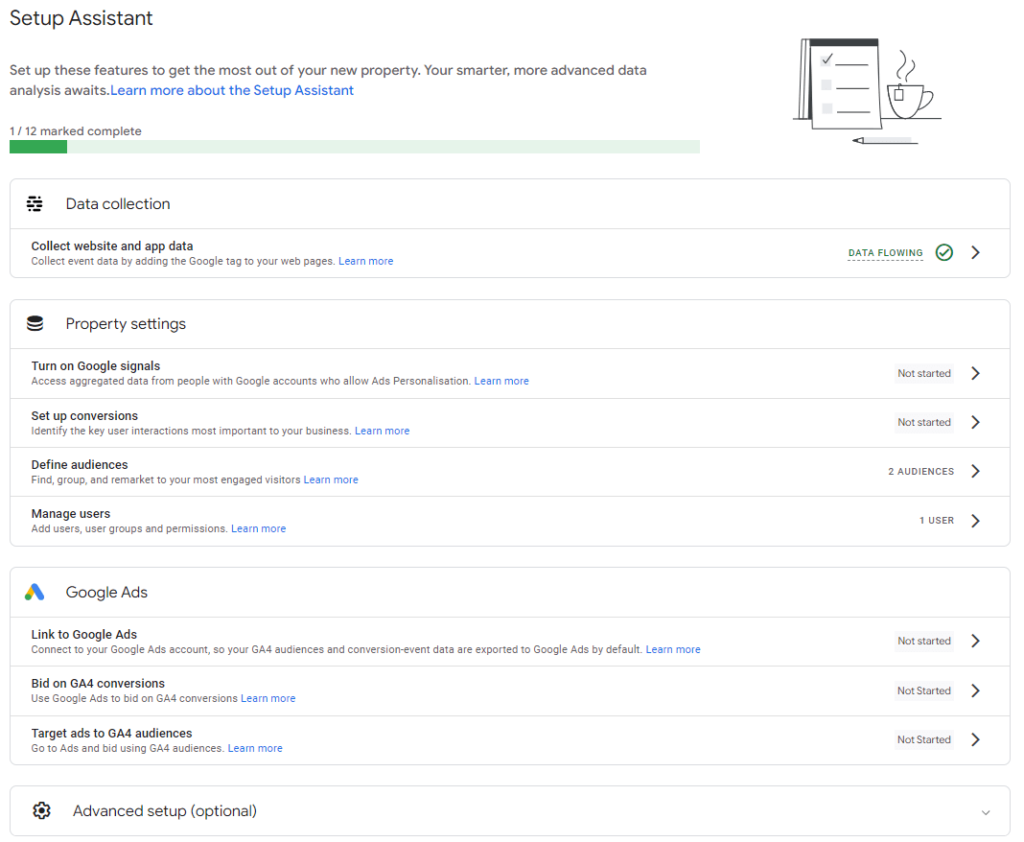
What to do after you’ve set up a GA4 property?
Google provides a handy checklist within the Setup Assistant that you can work through now that your GA4 property has been made. This screenshot shows I only have 1 out of 12 items completed. All of these items won’t be relevant to you, so take a minute and complete what makes sense.
Turn on Google Signals if you’re Advertising
Google Signals is a tool offered by Google that allows advertisers to track user behaviour across multiple devices (such as desktops, smartphones, and tablets) to better understand how they interact with their website and ads. This tool provides valuable insights to advertisers and enables them to create more targeted and effective ad campaigns.
If you don’t have any advertising plans, you don’t need to enable this right now.
Connect your GA4 Property to Google Ads
If you are advertising with Google Ads, you should link your Google Analytics 4 property with your Google Ads account. Here are some of the benefits:
- Improved data accuracy: By connecting GA4 with your Google Ads account, you can ensure that your advertising data is accurate and up-to-date.
- Advanced remarketing capabilities: You can use GA4 data to create more targeted remarketing audiences for your Google Ads campaigns.
- Better attribution modelling: GA4 provides more advanced attribution modelling capabilities, allowing you to understand the impact of your ads on user behaviour.
- Enhanced reporting: You can use GA4 data to create custom reports in Google Ads, providing you with deeper insights into your advertising performance.
- Cross-device tracking: GA4 tracks user behaviour across multiple devices, enabling you to understand better how users interact with your website and ads.
Connect your GA4 Property to Google Search Console
Limit the number of open tabs you use by connecting Google Search Console with your GA4 property. This way, you can see Search Console data directly inside Google Analytics.
Follow this tutorial to get it done.